Starting a small herb garden indoors is a fantastic way to add fresh flavors to your kitchen while bringing a touch of green into your home. Whether you have a sunny windowsill or a small countertop, cultivating herbs inside requires minimal space and can be very satisfying. This guide will walk you through everything you need to know to begin your indoor herb garden with confidence.
Why Grow Herbs Indoors?
Growing herbs indoors offers several benefits:
– Convenience: Fresh herbs are just a reach away while cooking.
– Year-round growth: Avoid seasonal limitations and enjoy herbs all year.
– Space-saving: Perfect for apartments or homes without outdoor garden space.
– Air quality: Plants help purify the air and improve indoor ambiance.
Choosing the Right Herbs for Indoor Gardening
Some herbs thrive better indoors because they tolerate lower light and space constraints. Good beginner choices include:
– Basil
– Parsley
– Chives
– Thyme
– Mint
– Cilantro
– Oregano
These herbs are relatively low maintenance and adapt well to container growing.
What You’ll Need to Get Started
Before planting, gather these supplies:
– Containers: Small pots with drainage holes or a shallow tray for multiple herbs.
– Potting mix: A well-draining, lightweight soil designed for indoor plants.
– Seeds or starter plants: Seeds are cost-effective but patience is needed; starter plants give a quick start.
– Light source: A sunny windowsill (south or west facing) or grow lights.
– Watering can or spray bottle: For gentle watering.
– Labels: To keep track of each herb.
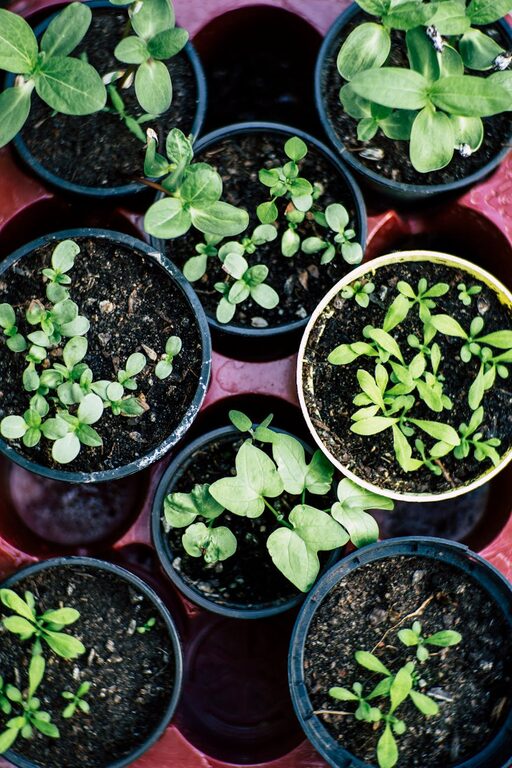
Step-by-Step Guide to Planting Your Herb Garden
Step 1: Select Containers
Choose pots that are about 4 to 6 inches deep with drainage holes to prevent waterlogging. Ensure each container suits the herb’s growth habit; for example, mint prefers wider containers since it spreads easily.
Step 2: Prepare the Soil
Use a high-quality potting mix that drains well. Avoid garden soil, which can be too dense indoors. Fill the containers, leaving about half an inch of space from the rim to allow watering.
Step 3: Plant Your Seeds or Seedlings
If using seeds, follow packet instructions for depth. Plant several seeds in each pot to ensure germination, then thin seedlings later. If using seedlings, gently loosen the roots and plant them at the same soil level they were growing at in their original containers.
Step 4: Provide Adequate Light
Herbs generally need 6–8 hours of light daily. Place your containers on a bright windowsill where they receive direct sunlight. If natural light is limited, consider using LED grow lights for 10–12 hours a day.
Step 5: Water Properly
Most herbs prefer soil that’s moist but not soggy. Water when the top inch of soil feels dry. Overwatering can lead to root rot, so always check drainage.
Step 6: Maintain Your Herbs
– Fertilize: Once every four to six weeks with a balanced liquid fertilizer diluted to half strength.
– Prune: Regularly pinch back growing tips to encourage bushier plants and prevent leggy growth.
– Rotate: Turn pots occasionally to ensure even light exposure.
Tips for Success
– Start small: Begin with two or three types of herbs you frequently use.
– Use trays: Placing pots in trays can help catch excess water and make moving plants easier.
– Monitor pests: Indoor herbs can occasionally attract pests like aphids or spider mites; wipe leaves and isolate affected plants if needed.
– Harvest regularly: Frequent harvesting encourages new growth but avoid removing more than one-third of the plant at a time.
Common Challenges and Solutions
| Issue | Cause | Solution |
|———————–|——————————|———————————————|
| Leggy, tall herbs | Insufficient light | Move to brighter spot or use grow lights |
| Yellowing leaves | Overwatering or poor drainage | Allow soil to dry between waterings |
| Wilting | Underwatering or heat stress | Water thoroughly and move away from heat |
| Slow growth | Lack of nutrients | Fertilize with balanced liquid fertilizer |
Enjoying Your Herb Harvest
Once your herbs have grown well, you can harvest leaves by pinching them off with your fingers or using scissors. Fresh herbs can be used immediately in cooking, added to salads, or infused into oils and teas.
Conclusion
Starting an indoor herb garden is a simple, rewarding project that fits any home. With just a few supplies and some care, you can cultivate fresh herbs that brighten up your dishes and your living space. Remember to choose suitable herbs, provide adequate light and water, and harvest regularly. Happy gardening!